Showing posts with label Christmas. Show all posts

Thursday, December 18, 2014

Christmas tree mini cupcakes


For my daughter's Christmas dinner at school I wanted to bring cupcakes or cookies and since I could not decide, I did both. First I burned all my fingers making home-made ice cream cones using this recipe (but in miniature form- 1 tablespoon of batter per cookie, shaped around a HEMA toy ice cream cone covered in foil). Then, I baked vanilla mini cupcakes and made some green basic butter cream.

I used kitchen shears to trim the cones to the right height. To make the trees, I piped a bit of icing in a circle on the cupcake and pressed the cone into the circle of icing. Then I used a leaf tip- Wilton 366 (large one) and Wilton 352 (same thing but smaller) to pipe branches (leaves) on the trees, starting from the bottom and going up. The more random the placement the better, and I used the big tip on the bottom branches and the smaller tip on the top with a single leaf coming out of the very top to finish it.
Dina was on decorating duty and did not disappoint. She choose which sprinkles to use and in what quantity. We discovered that while stable, these don't stay together if you tilt them 90 degrees to apply the decoration. In the photo below, you see her tilting at the maximum allowable angle. However, since most of them fell over during the car transport to school, I will also say that they looked remarkably good after rolling around all together- I think the cookie underneath kept the shape nicely.
My husband called these unjustifiable cones because upon returning home I tried to pipe trees without using the cones (I did not have a single extra cone which was stressful.) and lo! The trees are pretty adorable without using cones, too.
And I made a wreath and a cute sprig of holly, too. And neither of those required finger-burning cones.

Did I mention how much the cones sucked? No. Well. They did. But the cone scraps were pretty tasty on their own.

Dina and I made a forest.
 Christmas dinner success!


Tuesday, November 25, 2014

Cranberries- a recipe from my mom

Tis the season for Cranberries! My mom always makes a cranberry relish dish for Thanksgiving and Christmas. It takes a day or two for the flavors to come together, so do it today for Thanksgiving, which is in two days. It can sit for longer than that in the refrigerator- I actually prefer it after 4 or 5 days of the flavors melding. This recipe is super easy and flexible but you do need a food processor.

Ingredients:
1 bag of cranberries (I used 340 grams but any size bag is fine, just adjust the rest of the ingredients)
1 orange
1 apple
1/2 cup to 1 cup of sugar (you decide! Taste it before serving and make sure it isn't too sour.)

Method:
Rinse and sort the cranberries. They should be red, firm and feel hard like an apple. You wouldn't eat a soft apple, would you? Ditch the bad ones and keep the best for the recipe. Place the sorted cranberries, zest of the orange(only the dark orange part, the white bit is bitter- don't use it!), the juice from half the orange, and the apple, peeled and cut into chunks in a food processor.

Process until you are satisfied with the size of the chunks. Here are two examples (I prefer the second one- it has been processed a bit longer and therefore is finer.)

Add 1/2 cup of sugar (or less) and stir to combine. Let sit in the refrigerator at least overnight and preferably for a few days. Taste. Add more sugar if it is too sour.

I hope everyone has a very happy Thanksgiving!

Friday, May 11, 2012

Best Ever Chocolate Chip Cookies


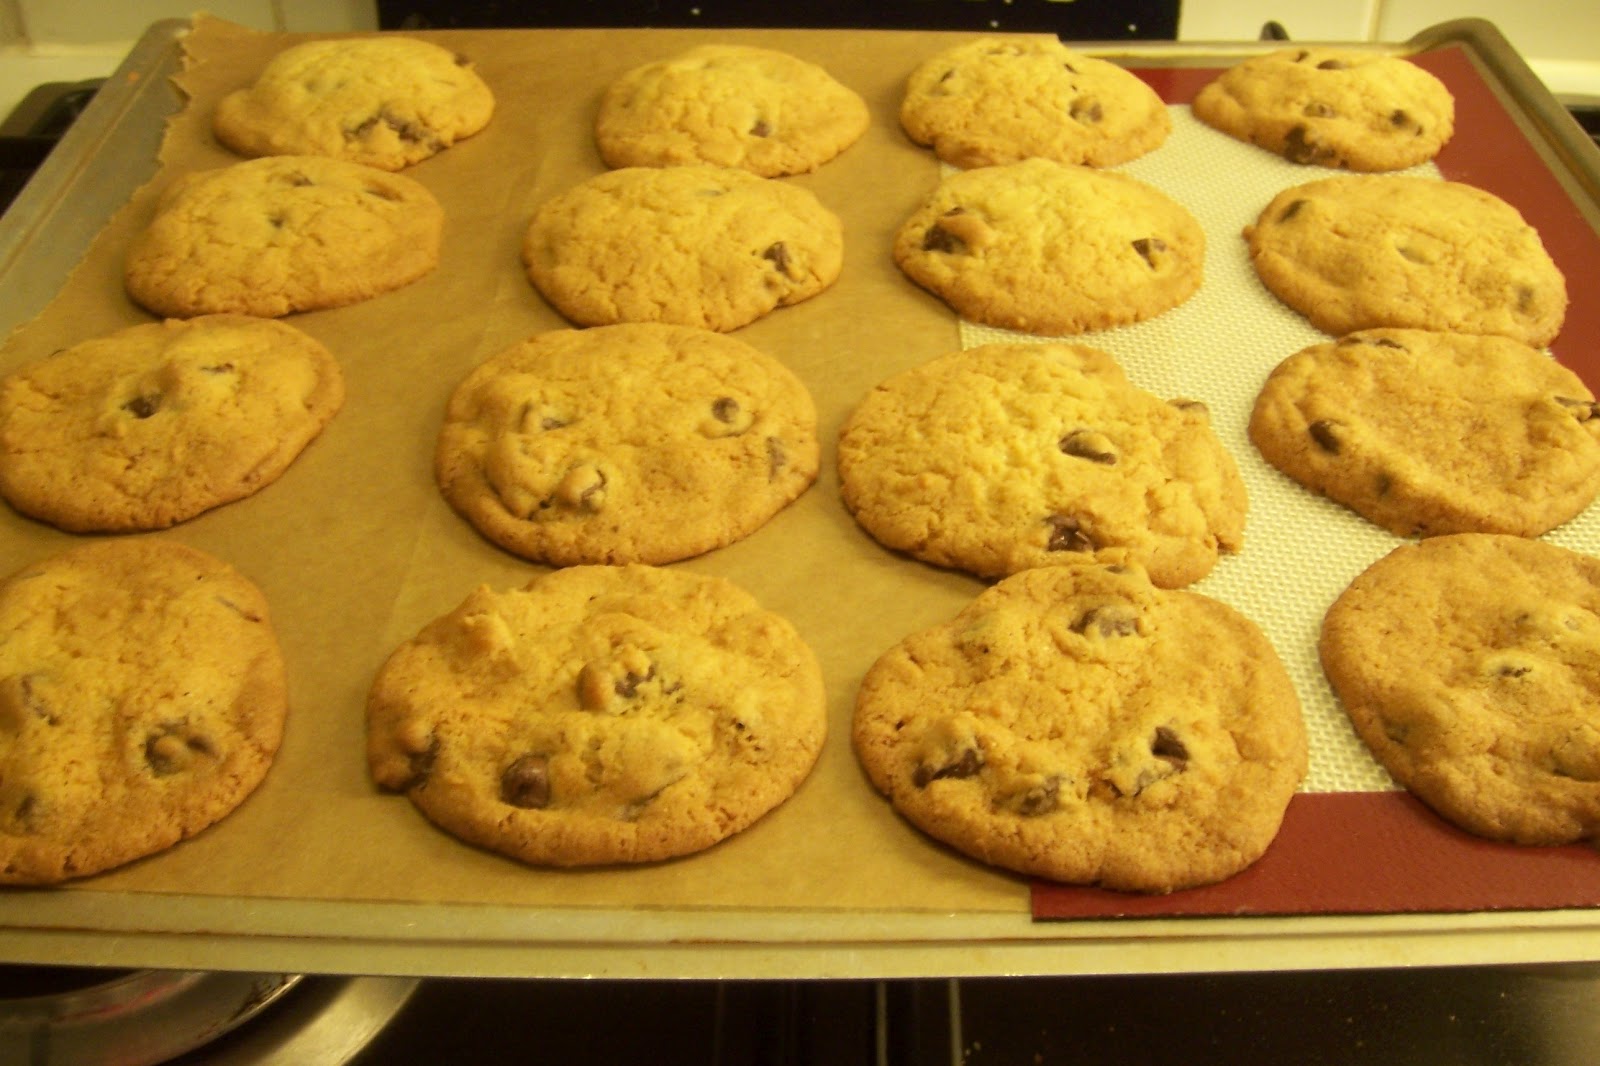
 A perfect chocolate chip cookie is irresistible to me. My Uncle Richard used to receive a couple of dozen from my mom every year at Christmas time. He would eat one right after another, until they were gone, and then lament that his belly ached. But, I understand completely. The slightly crisp exterior, soft and chewy interior, bits of chocolate of just the right size and shape... perfection.

Nestle Toll House Morsels has a recipe on their bag that I've used (substituting crisco for the butter) for many years. My grandmother was the first to make them, and then my mom, and now me. While I love this version, I've been experimenting a bit to bring some butter back into this cookie. Crisco, while perfect for some things, has no flavor. Butter, which makes cookies spread more in the oven making them thinner and therefore crunchy, has lots of flavor but (in this case) suboptimal properties. My Dutch friends might beg to differ- I gave some cookies to Marieke and she explained that cookies that are soft and chewy are actually considered 'gone bad' here, because they are stale from exposure to air. Packaged cookies are always crisp, so if they are soft, they've been left out in the Dutch humidity. To me, a crisp cookie means a packaged cookie, not homemade, and so less-good. I guess that's why I never got too interested in biscotti, because it is so crisp, even when fresh out of the oven.

I love the simple, natural ingredients in Nestle's Toll House morsels. The flavor of these chocolate chips brings me back to my childhood, at Christmas time. Other chocolate chips work just as well, and may even seem to have a deeper, darker chocolate flavor (which I appreciate!), however Nestle's evokes the memories for me, and so I bring back several bags when I travel to the US.

If you use chopped chocolate instead of (tempered) chips, keep in mind that the chocolate will melt on its edges a bit, for a more gooey experience (also delightful).

Best Ever Chocolate Chip Cookies
77 g butter @ room temperature (1/3 cup)
120 g crisco- vegetable shortening (2/3 cup)
157 g granulated sugar (Fijn Crystal suiker) (3/4 cup)
187 g packed brown sugar (light bastard suiker) (3/4 cup)
2 eggs
2 tsp milk
1 tsp vanilla
1 tsp salt
1/4 tsp baking powder
1 tsp baking soda
270 g all-purpose flour/ zeuwse bloem(2 and 1/4 cups but please use a scale for the flour)
250 g chocolate chips (9 oz)

Pre-heat conventional oven to 375 degrees F (180 degrees C)
Cream the butter and shortening until light and fluffy. Add the granulated sugar and brown sugar and beat until well blended. One at a time, add the eggs, scraping down the bowl after each addition. Add the milk and vanilla and mix just until combined. In a separate bowl, sift the salt, baking powder, baking soda and flour. Add flour mixture to butter/sugar mix a bit at a time, mixing just until combined each time, and scraping the bowl often. Once flour is almost completely incorporated, add the chocolate chips, mix just until distributed. Drop by rounded spoon onto cookie sheets (I use the two spoon method, scoop with one and push the dough out of the spoon with another spoon) and bake for 8 to 10 minutes. If you like your cookies very soft, take them out just before you think they are done. If you like a bit of crisp on the outside, leave them until they just begin to brown. Rotate your cookie sheet half-way through baking if your oven is uneven (most are).
Portioning cookie dough is always a challenge. Getting the cookies all about the same size can be tricky. The method I use harks back to my childhood. In order to split the last piece of cake or cookie, my friend and I would use the slice and choose method. One person would be in charge of slicing the cookie in half, and the other person would select which half she wanted.  The slicer has a strong incentive to make a perfect 50/50 cut, so it doesn't matter which half the chooser selects.  Needless to say, I always wanted to be the chooser. But what does this have to do with cookie portioning? Simply put: pretend you are the slicer with each ball of dough. Consider that after they are cooked, the cookie you get to eat will be the smallest one on the tray, or the one with the fewest chocolate chips. You can bet I make them all the same!!

If you are excited about keeping your cookies soft and fresh you can put small pieces of bread in the tin with the cookies. Don't allow the bread to touch the cookies directly, but rather put a piece of foil or parchment paper (baking paper) in between. Cover tightly and the cookies will stay softer than without bread. The rectangular tin above has bits of bread on the edges, on top of folded-over foil. We did taste tests and Mike preferred the ones without the bread keeping them extra soft (his comment was they did not taste any fresher, and he likes a bit of crunch on the outside), but I liked both versions.

Wednesday, December 14, 2011

Christmas Cupcake Fiasco

 A few of us (on the Mums and Toddlers group I'm on the committee for) decided it would be fun or interesting (or basically way better than the ridiculous dessert normally served) to bring cupcakes to our annual Christmas party. The party had about 40 adults who had rsvp'd, along with about 40 kids so we decided about 8 dozen cupcakes would work. Rachael and I each made 4 dozen cupcakes of varying Christmas related designs.  I'd love to say it was easy and great fun, but in reality it took a lot of time (although the design making was great fun) and I learned about how I have a propensity to over-do it. Why was this a surprise, you ask? Ha. The good bit was that I finally made buttercream. REAL buttercream- the kind which involves eggs being cooked (but not too much) and dissolving sugar in water and boiling it to a specific temperature and streaming said sugar/water into the eggs... so complicated and yet so luscious!!
The main reason I've hesitated on making buttercream this way is that my old standard of butter, powdered sugar and a bit of milk is really good, and works well to decorate a cake, cookies, or just spoon out of the bowl. It is quite sweet, however. Plus, I'd been watching the CIA's DVD Cake Decorating and the description of making Swiss buttercream really sounded almost easy. It was time to bite the bullet and try it. So, one night last week, I tried making the Swiss buttercream. And I had success! Once I did that, the world was my oyster. I'm not one to pre-judge a recipe, and in the CIA's Baking and Pastry book there are FOUR buttercream options, so I decided to try three of them. I also made the Italian (very similar to the Swiss) and the French (much different because it included egg yolks). And it only took me an entire evening, until 1:00am in the morning.
Then, naturally, we had a scientific taste test which meant my husband had to sample all these buttercreams. It was clear to both of us that the French buttercream had something amazing about it. The Swiss and the Italian both were outstanding, waaaaay better than the average standard buttercream... but the French. Ahhh the French! They really know how to blow you away with food, don't they!? It was almost like slightly melted ice cream but not cold. Other thoughts: smooth, airy, rich, fluffy, creamy, buttery, complex.
For days(four days, actually!) I made little toppers for the cupcakes, using white chocolate, red pre-colored marzipan, (and I meant to buy marzipan but accidentally ended up with green fondant- argh!), and white marzipan.  I piped, rolled, cut, and shaped poinsettias, candy canes, snowflakes, and holly.
It is handy to be able to do these sorts of things ahead of time, but of course then it becomes a situation where you spend as much time as you have (and that can be a lot if you aren't careful!). But I do love making the decorations! For the flowers and leaves, I dried the marzipan or fondant pieces on a curved surface, so they would have a bit of realism to them.
The day before the party, I baked the cupcakes. First, I made chocolate cupcakes using The Whimsical Bake House cookbook's Chocolate Butter cake recipe. Next, I used my good old standby,  CIA's Baking At Home classic white cake recipe to make vanilla cupcakes, which turned out to be a COMPLETE DISASTER.
I made biscuits. Not cupcakes. They looked terrible. Just look at them! Horrific, no? Who wants to eat that shit? I was mortified. My helpful husband said, "Frost 'em up! No-one will notice!" But I couldn't do it. Instead, I hunted in the cabinet for my panic box. The Pillsbury Yellow Cake mix box, that is. It was a cop-out but also a sanity check. Since I still had to frost and decorate these puppies, I decided that Pillsbury was better than biscuits.
Overall, I'd say it was a success. Would I do it again? Maybe...
The best part of all was watching my kid eat a cupcake. Her smile can melt butter. She choose the vanilla cupcake with a buttercream wreath and then proceeded to only eat the frosting. Smart girl.

For those thinking they might give a real buttercream a go, here is the (relatively easy) CIA's Swiss buttercream recipe (with my notes):

Swiss Meringue Buttercream
227 g sugar (1 cup plus 2 Tbsp plus 1 tsp- golly, isn't weight easier?!)
114 g egg whites (one large egg white is about 30 g, so a little less than 4 egg whites)
284 g butter, (about 2 sticks plus 4 1/2 Tbsp) at room temperature, no colder than 70 degrees F. (if it is colder than this you will have to heat your mixture)
1 tsp vanilla (5ml)
(You will also need a thermometer to attach to the side of your bowl)

1. In a stainless steel bowl set over simmering water, put the sugar and egg whites and whisk to combine. Heat, whisking constantly, until mixture measures at least 140 degrees F and not hotter than 165 degrees F. If you are worried about salmonella, you should make sure you hit 160 degrees F (70 degrees C).

2. Transfer the bowl to your mixer and whip the mixture with a wire-whisk attachment for about 5 to 10 minutes, or until the mixture is shiny. Touch the bowl to see if it is room temperature. (There is no risk of over-whipping here, so do not worry about that, just keep whipping)

3. If your bowl feels like room temperature, you are now ready to add the butter. Change your attachment to the paddle attachment and gradually add the butter, a small piece at a time while whipping at medium speed. The buttercream should look light and creamy. If it does not, your butter was too cold and you'll need to put your bowl over the pan of simmering water again and 'melt' it a bit to heat it up. Do not melt more than 5-10% of your mixture. The edges of your mixture should look a bit like ice-cream as it melts, and you should put it back on the mixer and see if it whips up nice before melting more of it if needed.

4. Add the vanilla. If you want a chocolate frosting, you can separately melt 128 g of bittersweet chocolate (good quality!) and then cool it to room temp, and then blend it in at this point in the process. You can also add mint flavoring (about 1/4 tsp) if you want a chocolate mint. (yum!)

5. You can use the buttercream now, or cover the buttercream with plastic wrap and store it in the fridge at this point for up to 1 week. To 'reconstitute' it, leave it out at room temperature for several hours, or, do the melt it over a pan of simmering water routine and then whip it with a paddle attachment until it looks smooth and creamy. You can also freeze it for up to a couple of months.

6. Load it into a piping bag with a star tip, or a plain round tip and pipe it onto your cake or cupcakes. Enjoy!

Saturday, December 3, 2011

Peanut Butter Kiss Cookies

The holiday baking season is upon us! Joy abounds!
It's beginning to look a lot like CHRISTMAS! Peanut Butter Kiss Cookies made with Dutch peanut butter and imported American Hershey kisses. It is a marriage made in heaven. Fine tuning this recipe resulted in less sugar than the original, which of course is (almost) always a good thing.


Adapted from my Aunt Mary Lee's recipe(love you, Aunt MLG!):
Peanut Butter Kiss Cookies
1 cup unsalted butter (230 g)
1 cup creamy peanut butter (260 g Calve Pindakass)
1 cup brown sugar (220 g bastard suiker)
2/3 cup granulated sugar (150g fijn suiker)
2 eggs
1 tsp vanilla
2 1/2 cups flour (300 g Zeeuwse bloem)
2 tsp baking powder
1/8 tsp salt
56 Hersheys Kisses, unwrapped

1. Pre-heat oven to 350 degrees F (176 degrees C)
2. Mix butter, peanut butter, brown sugar, sugar in mixer and beat until blended. Add eggs, one at a time, then add vanilla.
3. Mix dry ingredients together, then add to mixture.
4. Drop by rounded teaspoon onto parchment-lined baking sheet.
5. Bake, one sheet at a time, rotating half way through baking for about 12 minutes total.
6. As soon as you pull the tray out of the oven, stick a Hershey's kiss in the center of each cookie.
7. Allow to cool on tray about 3 minutes, then on racks until cool.

Makes 56 cookies.