Frosting a cake never tasted so good! If you want a simple alternative to my favorite Swiss Meringue Buttercream, the Basic Buttercream recipe I've been refining does the trick. It also pipes beautifully, smooths perfectly, and tastes divine.
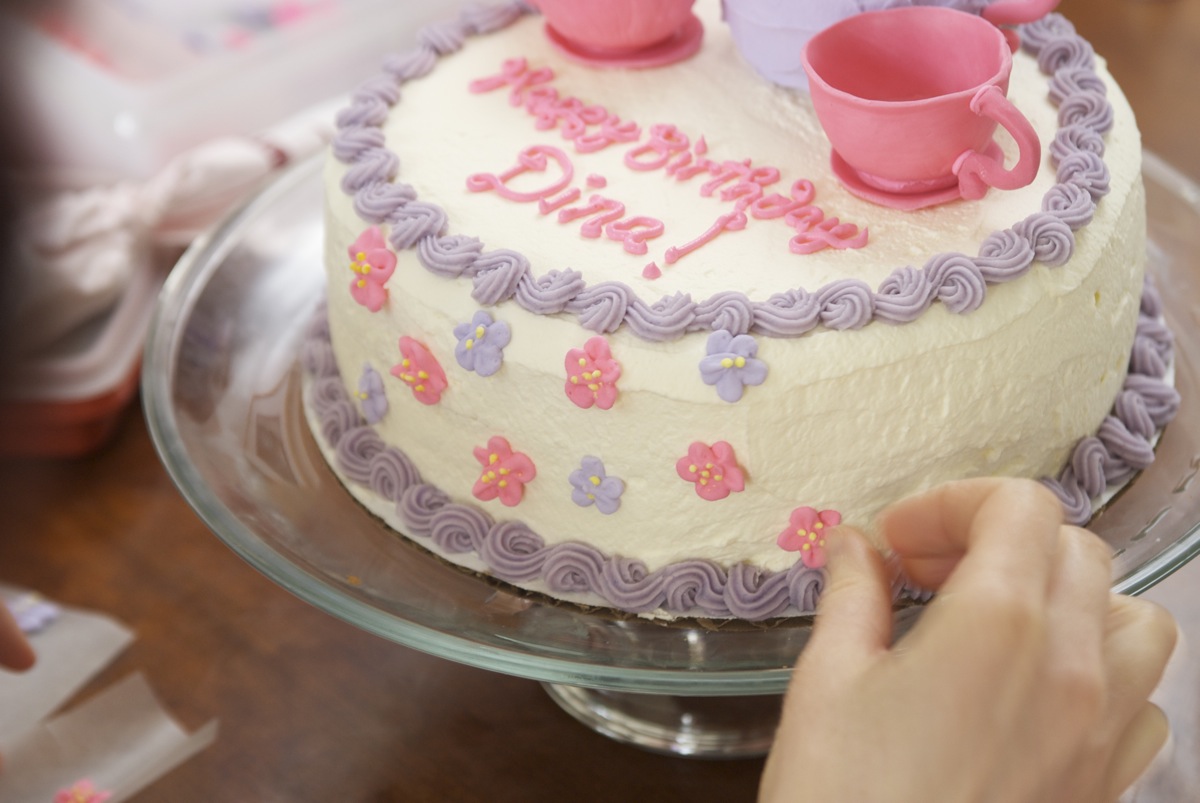
For Dina's school party this year I made cupcakes from a box (don't judge me!) Duncan Hines yellow cake mix (was it Classic Yellow or Butter Recipe Golden? I don't remember.) Here in Eindhoven, this can be found at Jumbo supermarket in Veldhoven or Rohit. Of course I can't just make a box cake mix without some kind of modification so I substitute a low-fat milk for the water in the recipe. I ended up with 24 cupcakes (fill them up about 50-60% of the way so you get a nice domed top) from one box, which meant, once baked, they came just over the top of the cupcake liners.
Normally I bake 22 from a box, and fill them more, for a bigger dome top, but this was for a party with two and three-year-olds. Less is more!
Once the cupcakes cooled, I frosted them with a Basic Buttercream. The key to any frosting is, of course, the ingredients. The butter available everywhere here in the Netherlands kicks serious ass. The powdered sugar... not so much. I've only found proper 'icing' sugar or 'Poeder Suiker' at the Genneper Park molen, and the Dommelsche molen. Those of you listening back home can use Domino 10x, you lucky people. If you are unable to get powdered sugar (do not use AH brand powdered sugar, it is too grainy and will result in frosting that has the texture of sand) you can use a food processor to process the Fine crystal sugar available at AH and sift it, many times, until you achieve the right consistency. The 10x in the Domino brand sugar stands for process and sifted 10 times. I'm lazy so I just stock up when I go to Genneper park- powdered sugar never goes bad.
Basic Buttercream Frosting
230 g unsalted butter
500 g powdered sugar (one bag)
1 tsp vanilla extract
1 tsp meringue powder (Wilton brand is what I used)
2 Tbsp water
1/8 tsp salt
Start with the butter at room temperature. Beat the butter in a mixer until it looks smooth. Slowly add the powdered sugar, scraping down the bowl after each 100 g (approximately). Once all the powdered sugar is incorporated, add the remaining ingredients. Beat well. If the frosting is too stiff, you can add more water, 1 tsp at a time.
Frosting can be left at room temperature for a few days, but should not be left in direct sunlight, or a very warm room.
I colored the frosting using Wilton gel color purple, and added sprinkles we bought in Germany, which are very similar to American sprinkles. Using a piping bag with Wilton tip 2D, I piped a swirl on top of each cupcake and let Dina add the sprinkles. They were sitting in the pie-taker on the counter (covered) for about an hour in the morning before I brought them to her school, and in that time, the sunshine from my window actually faded the purple frosting on one edge! Wacky, no?
You can see it at the top of this photo- the edge of several cupcakes looks blue. My husband at first thought it was a lighting effect, but it is actually the color, faded, in just an hour of sunlight, through the clear plastic container!
The Dutch tradition (at least in Dina's school) is for the birthday child to wear a crown (Dina picked purple, of course) and as each child comes to shake her hand, she gives each classmate a cupcake(or other treat). We were excited that among all her dresses, she choose the dress my grandmother made and I wore as a child to wear on her special day.
This lucky kid got to eat TWO cupcakes, one at school and one after dinner on her birthday. Dina insisted that I do something simple for her school cupcakes. The remaining cupcakes got a more fancy treatment, using a Wilton petal tip, and my husband took some photos.
Showing posts with label Wilton. Show all posts
Friday, April 13, 2012
Tuesday, April 3, 2012
Warning! Red dye is not for kids...
My daughter, Dina had her 3rd (time flies!) birthday party over this past weekend, and I used a bit of red marzipan on her cake. I've never been a fan of fondant, (although I've not yet made my own, I've heard when you make it yourself, with choice ingredients it can actually be edible) and some might say, 'it looks amazing!' but I guess I'd rather use the phrase 'it looks like plastic!' to describe the fondant cakes I've seen. Never mind how bad it tastes- fondant looks like plastic and tastes like plastic, in my opinion.
Marzipan, on the other hand, is edible (almonds typically make up 20% of marzipan, the rest is mostly sugar) and can be made to look similar to fondant (smooth finish on top of a cake). Marzipan shaped like animals, fruits and other tid-bits are commonly found seasonally in Europe. I prefer the French marzipan (the French are all about amazing food) over the German version but can't say I'd ever choose a marzipan pear over a chocolate bon-bon. I was intent on using red and white for the top of Dina's cake and it is always difficult to color red your own icing/frosting at home. Every time I try to dye frosting red it comes out orangey-red or dark pink- even using tons of the fancy red food coloring gel from Wilton. Also, if I add too much, my frosting separates. However, red pre-colored fondant or marzipan have a gorgeous color. How do they get it so red? Not without something not-so-nice inside!
A translation from Dutch into English of the ingredient list for the red marzipan (Marsepein Rood) I got at V&D follows:
sugar, 20% almonds, stabilizer(Sorbitol- a sugar alcohol), glucose syrup, Allura Red AC, thickening agent Carboxy methyl cellulose, invertase(an enzyme that catalyzes the breakdown of sucrose), acidulant (Citric acid- to lower pH and to impart a tart, acid taste), aroma. This product can contain traces of milk, soy, egg. Allura Red AC can impact the activity and attention in children.
Yes, on the packaging it actually states, "Allura Red AC can impact the activity and attention in children." My friend Marieke pointed this out to me when I told her I was using red marzipan (she noticed the same warning on the red fondant she used on her son's cake). Turns out that Denmark, Belgium, France, and Switzerland have all banned the substance. In the USA it is called, "Red 40" and is in many products including cotton candy, soft drinks, and children's medications.
Wikipedia explains that a study done in 2007 showed increased hyperactivity in children who ate Allura Red AC. The article goes on to recommend the following dyes be avoided by hyperactive children: Sunset Yellow, Carmoisine, Tartrazine, Ponceau 4R, Quinoline Yellow WS and Allura Red. Since I live in the EU, I have to memorize a bunch of E-numbers rather than names as described above. Allura Red AC is E129. Here is the list of the rest:
E110: Sunset Yellow
E122: Carmoisine
E102: Tartrazine
E124: Ponceau 4R
E104: Quinoline Yellow WS
also, a food preservative is also named a culprit: E211: Sodium benzoate
I did end up using the red marzipan on her cake in small amounts, however, I suggested the children eat the cupcakes which I made with a simple buttercream.
Maybe I'm dating myself by admitting that I remember the red dye scare that happened when I was a child, because I remember that no red M&Ms existed until 1985. This was in spite of M&Ms not even containing the cancer-causing Red Dye No 2(E123)- which, incidentally, is still used in the UK for Glace cherries. I remember when red M&Ms first arrived during Christmas of 1985. It was so exciting to eat red M&Ms!
Of course this has me pondering about what alternatives exist for getting a gorgeous red color and yet not having a hyperactive toddler afterwards. Wikipedia also discusses the food coloring carmine (E120), which is derived from insects. Not without issue, carmine causes a severe allergic reaction in some people and also is not for vegans or kosher. It is banned in New Zealand as of 2009, presumably because of the allergic reactions.
Red Beets are another option, however the color is not such a bright red. Still, as a natural substance, you can't get more earthy than beets.
Tuesday, March 6, 2012
Angel Food Cake Failure
My mom's favorite cake is Angel Food Cake, which (having lived in the USA with ample supply of said cakes) I had never made before. I thought of it earlier this year before my mom was going to visit us and decided to give it a try.
Since I was not to be deterred, and wasn't ready to purchase a tube pan, I decided to ask the internet for advice. When I tried a rectangular glass 9x13 inch baking dish, I had slightly better results, albeit still not pretty- with the cake only reaching about 1.5 inches in height. I guess I'll ask for a tube pan for my birthday this year!
Friday, March 2, 2012
Finding Cake supplies in Eindhoven
Watermolens (water mills) here in the Netherlands are both places to purchase baking supplies and at the same time, pet stores. Intuitively it makes sense, when you consider the grain is processed by the mill, powered by the river water. Flour is created, and grain for animals created, all with large stone grinders. When I first heard of this I thought it was strange but now it seems normal. Without my favorite Michaels around, I have to get my Wilton cake supplies fix somewhere, and De Dommelsche Watermolen is the place!
Located just south of Valkenswaard, (take N69 south, and turn right onto N397, you'll see it after a small river, on your left side).
Bergstraat 1
5551 AW Valkenswaard, Netherlands
In the background you see the different types of flours available. Zeeuwse bloem here is 1.50 instead of 1.25(at Genneper Park Watermolen). Check out all that Wilton stuff! And even Crisco- (4 euro for a tiny can). They have fondant, marzipan, gum paste, and everything you need to shape the stuff. Cookie cutters galore, cake pans, sprinkles, etc- it is all there. They even have chocolate chips made from Callebaut chocolate (you can also find them at Genneper Park, and I think the price is a bit cheaper there).
I was excited to find some special carousel candles for Dina's upcoming 3rd birthday. It is difficult to find carousel themed items and it looks like on Wilton.com, that this particular product has been discontinued, so I feel extra lucky to have scored these! They even had the carousel cake creator (for only 35 euro- it is $25 in the US! Love that EU tax! It is a stand, plastic horses that can support the shaped top made of plastic which you are supposed to cover with fondant)... but I felt like it wasn't for me. I feel the need to make the entire cake structure edible. Obviously, I'll have to use supports that are not-edible, but I don't want a fondant-covered plastic thing on the cake. At this point I'm making sketches and test-cakes (husband is happy with that) and so we'll see how it goes!
Tuesday, February 28, 2012
Dina's Second Birthday - Barnyard Theme
Choosing a theme for Dina's second birthday was exciting to me, because for the first time she could tell me what she wanted. Unfortunately, she didn't have much to say about it. "Chocolate!" was about all I could get out of her with respect to a theme. Since her favorite toy at the time was her Fisher Price farm we got at Queen's Day (giant garage sale) the previous year, I decided to go with a Barn-Yard bash.
My first challenge was finding a plate big enough to hold the design- Inge saved the day in that regard. The white platter I used is HUGE- 20 inches across (51cm). My sweet husband used sketch-up to create a barn coming out of a 9" round cake, complete with silo, so I'd have measurements. My biggest concern was getting the proportions correct, so I modeled the animals to be similarly sized to the little plastic ones Dina loved. I only had the horse and chicken to work from, so for the rest of the animals I had to wing it.
About two months before hand I made a test cake to check my estimates of the sizing with respect to her plastic horse:
The size of the little plastic horse looked decent, and this gave me an opportunity to measure an actual cake, frosted. Using sketch-up for the sizes, I cut out graham cracker pieces for the barn and glued them together using Royal Icing. I had to use a small box to prop it up to dry.
My friend Marieke holding the printout of the sketch-up design:
Creating the animals out of gum-paste took me several hours, over the course of several nights. Once I had a couple made, though, the rest of them went much quicker than the first few.
My favorites were the sheep and the pig. They just looked so friendly! I didn't end up using the chicken eggs that I made. The bright colors(like the chicken's feet) I got by applying Wilton gel-coloring directly to the finished animal. Made for a bit of a mess, and tough to handle without getting the color everywhere, but it looked bright.
The stone path was also made using gum-paste, and I didn't blend the gray/black colors completely, so I could get a mottled texture for some of the stones. Using a piece of plastic wrap inside a small bowl, I made a blue jello pond (only half the recommended water in the recipe) which I let set for a day in the fridge and placed it at the last minute on the platter for the duck to swim in. Interestingly, within a few hours the gum-paste duck began to literally melt into the jello-pond.
The silo was made with a cupcake placed on top of the cake, and graham cracker pieces to form the edges. I coated it with royal icing (the barn too), and got the bright color by using Wilton's no-taste red gel coloring.
The inside of the cake was chocolate (of course) with a chocolate ganache filling. My friend Sam (above) really enjoyed the royal-icing coated graham crackers and was excited to try a chicken wing.
The only thing I did not get a chance to do was my plan to have the writing on the cake be made by a sky-writing plane. My idea was to have the exclamation point trail off a bit with a plane below it, as if it just completed writing in the sky. But I ran out of time.
The cake and the grass are buttercream icing, and the pig's mud is crushed Oreo cookies. The chicken is hanging out in crushed cookies, too and the horse has a bit of Haribo candy coil in the barn. I made the small hill the sheep is standing on using the shavings from the cake (to make the cake flat on top).
What was most important was my Dina's reaction. And it was priceless:
She gave it her all blowing out the candle:
The benefit to using gum paste is that when your creations dry, they are stiff, unlike fondant, which sags if you leave it at room temperature. The animals were made a few days in advance, so by the time we ate the cake, they were quite hard. The stone path I made the night before, so the stones were still a bit soft but did hold their shape okay. Everything on the cake was edible, and we ate (almost) every last bit.
Labels:
2,
barn,
barnyard,
birthday,
buttercream,
cake,
chocolate,
cow,
Dina,
duck,
farm,
graham crackers,
gum paste,
horse,
jello,
pig,
royal icing,
second,
sheep,
Wilton
Tuesday, November 8, 2011
A Special Cake for Dina's First Birthday
I'm going to attempt to post about cake at least once a week so that my blog name remains relevant. When Dina was turning one, I considered her favorite toys and decided her tea-pot and tea-cups would be the perfect theme for her birthday party. Additionally, they had the added bonus of being a perfect cake topper, in case I couldn't get it together enough to create edible ones. First, I made a test-cake, to see what proportions I needed for the tea set. The actual tea set fit on the test cake pretty well- maybe a bit too big. I also tried some fun borders to see what I liked best.
![]() | |
The test cake- making borders. Everyone loves test cakes. |

Next, I thought I'd try to create the tea cups from gum paste I got at the Dutch Cake Event earlier that year. A word to the wise: Don't use a finite supply of anything if you are worried about the colors matching. Always make more than you think you will need for your project. Along with the tea cups I made the flowers and butterflies ahead of time. The Wilton Royal Icing recipe is awesome for making flowers. You don't even need to do them as perfect as the ones you see online. Here, you can observe I've made what amounts to five 'petals' but might also be referred to as 'lumps' with yellow dots in the center. Once they are on the cake, no one will notice if they are perfect, trust me.

For the butterflies, I folded wax paper over a box (just needed a 90 degree angle) and piped the wings on each of the sides of the box, and the body of the butterfly down the seam. Give it about 48 hours to dry completely and you have three dimensional butterflies!

Next, I looked online at one of the many font shops to see which font I liked. I can't remember which one I choose, but then I my husband printed it to the right size and then I held it above where I wanted the writing to be, checking it for size and shape as I piped onto the cake:
I placed the tea cups, flowers, butterflies at the last moment because I used a whipped cream frosting which, over time (like an hour or two) will begin to melt a bit, even if stabilized. A side note: Dutch whipped cream is the bomb, people.
The tea pot was made painting Royal Icing over top of a balloon and allowing it to harden. I used one of Dina's balls from her ball-pit for supporting the shape of the lid of the tea-pot (a circle made from gum paste) and the gum paste ball on the top of the lid was attached with Royal Icing as well. The purple wiggle boarder on the cake was made with buttercream icing and the filling was strawberries and cream.
Most people use fondant for covering cakes but I'll save my opinion of fondant for another post. While I agree that cakes should look beautiful, I also believe they should taste amazing, no matter what they look like! 

Using the Culinary Institute of America's white cake recipe, I then torted each cake to make four layers, layering strawberries and homemade strawberry sauce inbetween.
The most important part of this project was my baby girl's reaction. At her first opportunity, she grabbed a tea cup! Success!
Dina's first birthday party- I will never forget it. I love you, my sweet Dina!
Labels:
birthday,
borders,
butterflies,
CIA,
first,
flowers,
icing,
method,
strawberries,
tea cups,
tea pot,
white cake,
Wilton
Subscribe to:
Posts (Atom)